Pages

Ads 468x60px

For New Update Use this Link http://dotnethubs.blogspot.in/ Offer for you

.

Wednesday 3 April 2013

How to Prepare Yourself for the Interview

How to Prepare Yourself for the Interview

How to Prepare Yourself for the Interview


I would like to provide you some of the valuable tips that have been researched and may work wonder for you.
Following are the things you must be prepared about:
1)    Things to be prepared before interview
  • Firstly analyze and re-read the job requirement detail and description and specification as well as nature of job. Match up the skills and knowledge you possess and the position you are interviewing for.
  • Searching and collecting vital information about the company would surely work in favor of you. The better you can present your insights about the company, the more you can get your employer impressed.
  • Expect some of the questions that would possibly be asked and accordingly prepare all the answers highlighting all your accomplishments, knowledge and skills through certain practical examples.
  • Finding out the name as well as title of the interviewer followed by time and place is vitally important for you. And practice again and again.

2)    During the interview
  • You must arrive 10-15 minutes earlier than normal schedule of interview.
  • Choose out matching clothes and dress up professionally.
  • On meeting the person interviewing you, make sure to maintain your eye contact, give warm smile and shake your hands firmly.
  • Never forget to carry your portfolio such as (copies of your résumé, transcripts, references, etc.)…
  • Show your positivity and enthusiasm because these are the qualities that are often sought by employers when it comes to determining suitability of any candidate for the post applied.
  • Maintain confidence and time while answering the questions asked.
  • Never forget to thank the employer after concluding the interview and firmly shake your hands and say good bye while leaving.

jquery form validation in asp.net

jquery form validation in asp.net

Introduction:

Validation is an important requirement in every enterprise application and every platform has its own implementation to this regards. In this article, I will illustrate how to implement client-side validation in ASP.NET using jQuery.

Description:


Now let's open the Visual Studio.NET and create a Web project for the example. Then add a new Web form for the user to enter some data below


Download the .js file and add you project in Scripts folder
Download Link is :Js Files
OR
Direct include the file like this
<script type="text/javascript" src="http://ajax.googleapis.com/ajax/libs/jquery/1.3.2/jquery.min.js"></script>
  <script type="text/javascript" src="http://ajax.microsoft.com/ajax/jquery.validate/1.5.5/jquery.validate.min.js"></script>


Jquery code for form validation as shown below


<head runat="server">
  <title></title>
  <link href="StyleSheet.css" rel="stylesheet" type="text/css" />
  <script type="text/javascript" src="Scripts/JScript.js"></script>
  <script type="text/javascript" src="Scripts/JScript2.js"></script>
  <script type="text/javascript">
    $(document).ready(function () {
      // Initialize validation on the entire ASP.NET form
      $("#form1").validate({
     
        onsubmit: false
      });

      $("#Order").click(function (evt) {
   
        var isValid = $("#form1").valid();

     
        if (!isValid)
          evt.preventDefault();
      });
    });
  </script>
</head>

.aspx from code as shown below


<form id="form1" runat="server">
    &nbsp;

  <fieldset id="BillingInfo">
    <legend>New User Registration</legend>

    <label for="FirstName">First Name:</label>
    <asp:TextBox runat="server" ID="FirstName" CssClass="required" />
 
    <label for="LastName">Last Name:</label>
    <asp:TextBox runat="server" ID="LastName" CssClass="required" />
 
    <label for="Address">Address:</label>
    <asp:TextBox runat="server" ID="Address" CssClass="required" />
 
    <label for="City">City:</label>
    <asp:TextBox runat="server" ID="City" CssClass="required" />
 
    <label for="State">State:</label>
    <asp:TextBox runat="server" ID="State" CssClass="required" />
 
    <label for="Zip">Zip:</label>
    <asp:TextBox runat="server" ID="Zip" CssClass="required digits" />
 
    <asp:Button runat="server" ID="Order" Text="Submit " />
  </fieldset>
</form>

Full Image of Aspx Page Jquery and html code as show below


Output At the run time as shown below :- Click on Button then  get the jquery validation error corresponding to text box

2 : -Jquery Form Validation With Asp.Net With Source Code
In this example i will  explain how i can validated to email and text box using  jquery

Full Example as Show Below only Copy and Past this Code in our Page


<html xmlns="http://www.w3.org/1999/xhtml">
<head runat="server">
    <title>Jquery from validation</title>
    <script src="http://code.jquery.com/jquery-latest.js"></script>
  <script type="text/javascript" src="http://jzaefferer.github.com/jquery-validation/jquery.validate.js"></script>
<style type="text/css">
* { font-family: Verdana; font-size: 96%; }
label { width: 10em; float: left; }
label.error { float: none; color: red; padding-left: .5em; vertical-align: top; }
p { clear: both; }
.submit { margin-left: 12em; }
em { font-weight: bold; padding-right: 1em; vertical-align: top; }
</style>
 <script>
      $(document).ready(function () {
          $("#commentForm").validate();
      });
  </script>

</head>
<body>
    <form  class="cmxform" id="commentForm" method="get" action="" runat="server">
    <fieldset>
   <legend>A simple comment form with submit validation and default messages</legend>
   <p>
     <label for="cname">Name</label>
     <em>*</em><input id="cname" name="name" size="25" class="required" minlength="2" />
   </p>
   <p>
     <label for="cemail">E-Mail</label>
     <em>*</em><input id="cemail" name="email" size="25"  class="required email" />
   </p>
   <p>
     <label for="curl">URL</label>
     <em>  </em><input id="curl" name="url" size="25"  class="url" value="" />
   </p>
   <p>
     <label for="ccomment">Your comment</label>
     <em>*</em><textarea id="ccomment" name="comment" cols="22"  class="required"></textarea>
   </p>
   <p>
     <input class="submit" type="submit" value="Submit"/>
   </p>
 </fieldset>
    </form>
</body>
</html>

Screen Short As Shown Below


Download sample code attached


Tuesday 2 April 2013

how to count number of button clicks in asp.net

how to count number of button clicks in asp.net ?
Introduction:
Here, we will see how to check number of click on button click by the user.When user click on the button automatically increment by one.
Description:
In this article how i can count the user click on button .its a static counter when user refresh the page the counter start from zero. in my previous article i have explained how i can count the total click by the user on button click and display the result in text box.

Html file code as  shown below

Its a simple javascripts code for generate the number on button click by the user

<script type="text/javascript">
    var index = 0;

    function increment(var1) {
        index++;
        if (var1 == 1)
        { document.getElementById('button1').value = index; }
        else
        { document.getElementById('button2').value = index; }

    }
</script>
calling the javascript funtion on button click and display the total click by the user

<form id="form" runat="server">
    <div>
    <input type="button" id="button1" onclick="increment(0)" value="increment"/>
    <input type="button" id="button2" onclick="increment(1)" value="increment again"/>
    </div>
    </form>

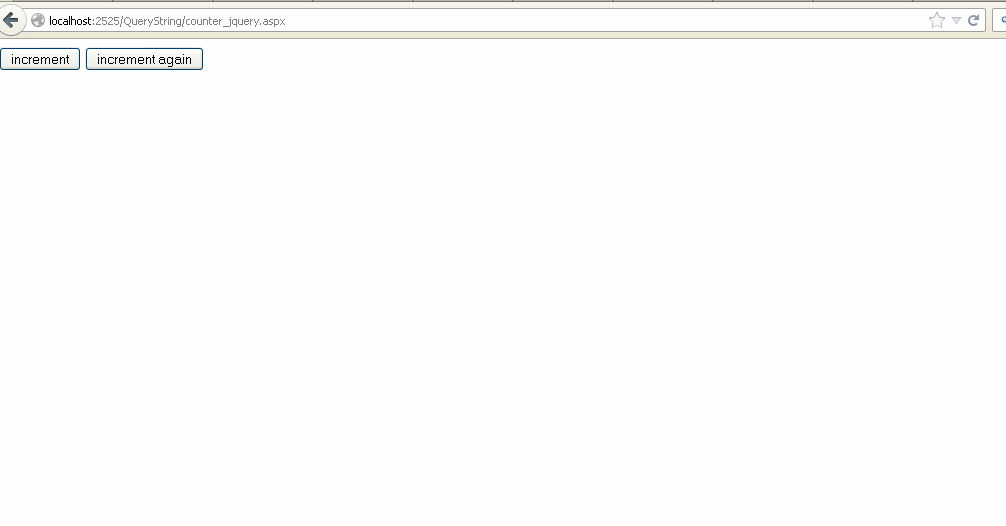
Image for show all the complete code as show below
Example show below


Download sample code attached

Monday 1 April 2013

Count the number of times a submit button has been clicked

Count the number of times a submit button has been clicked

Count the number of times a submit button has been clicked

Introduction
  How i can find the user click on submit button in multipal time

GUI Html Code As Shown Below

<%@ Page Language="C#" AutoEventWireup="true" CodeFile="counter.aspx.cs" Inherits="counter" %>

<!DOCTYPE html PUBLIC "-//W3C//DTD XHTML 1.0 Transitional//EN" "http://www.w3.org/TR/xhtml1/DTD/xhtml1-transitional.dtd">

<html xmlns="http://www.w3.org/1999/xhtml">
<head runat="server">
    <title></title>
</head>
<body>
    <form id="form1" runat="server">
    <div>
  
        <asp:Button ID="Button1" runat="server" onclick="Button1_Click"
            Text="counter" />
&nbsp; Show Total Click of Particular User
        <asp:TextBox ID="TextBox1" runat="server"></asp:TextBox>
  
    </div>
    </form>
</body>
</html>

From Image as shown below
On Button Click Couter Code Behind 
static int count = 0; 
protected void Button1_Click(object sender, EventArgs e)
    {
        count++;
        int totalcount = count;
        TextBox1.Text = totalcount.ToString();
    }

Output as shown below

Download sample code attached


Simple difference between String and StringBuilder asp.net

Simple difference between String and StringBuilder asp.net

Simple difference between String and StringBuilder asp.net

The main difference beween string and stringbuilder is that when we are copying two string in the case of string concatination is done means that one string is attached to another string and attaced string is deleted, and one new memory allocation is done.it takes lot of time and this is time taking process.


but in case of stringbuilder copying two stings means string1 is appended to string2 or vice versa.no memory allocation and deletion of string.So it is very efficient process and it takes less time.

Difference Between String and String
String


1.Its a class used to handle strings.
2.Here concatenation is used to combine two strings.
3.String object is used to concatenate two strings.
4.The first string is combined to the other string by creating a new copy in the memory as a string object, and then the old
string is deleted
5.That is why  "Strings are immutable".
6. Slower

String Builder
1.This is also the class used to handle strings.
2.Here Append method is used.
3.Here, Stringbuilder object is used.
4.Insertion is done on the existing string.
5.Usage of StringBuilder is more efficient in case large amounts of string manipulations have to be performed.
6. Faster

class
Program{static void Main(string[] args){
//for example:

string str = "hello"; //Creates a new object when we concatenate any other words along with str variable it does not actually modify the str variable, instead it creates a whole new string.
str = str + " to all";Console.WriteLine(str);StringBuilder s = new StringBuilder("Hi");s.Append(" To All");Console.WriteLine(s);Console.Read();}
}

query string in asp.net

query string in asp.net

Introduction:

The QueryString collection is used to retrieve the variable values in the HTTP query string.
The HTTP query string is specified by the values following the question mark (?),
 like this:
http://localhost:2525/QueryString/getquerystring.aspx?name=rahul&password=123.
 Query strings are included in bookmarks and in URLs that you pass in an e-mail. They are the only way to save a page state when copying and pasting a URL.

Description:


Now I have one page which contains one textbox and button control I need to send textbox value to another page when we click on button control for that we need to write the code like this
protected void Button1_Click(object sender, EventArgs e)
{
Response.Redirect("getquerystring.aspx?name="+this.txt_nm.Text);
}
Or
In case if we need to send multiple parameters to another page we need to write code like this
protected void btnSend_Click(object sender, EventArgs e)
{
Response.Redirect("getquerystring.aspx?name="+this.txt_nm.Text+"&password="+this.txt_pass.Text);
}
Now we need to get these values in another page (here I mentioned Default2.aspx) by using QueryString Parameter values with variable names or index values that would be like this
protected void Page_Load(object sender, EventArgs e)
{

string name = Request.QueryString["name"];
string password = Request.QueryString["password"];

}

first create new website and open Default.aspx page and write the following code
<html xmlns="http://www.w3.org/1999/xhtml">
<head runat="server">
<title>QueryString Example in asp.net</title>
</head>
<body>
<form id="form1" runat="server">
<div><b>QueryString Example</b></div><br />
<div>
<table>
<tr>
<td><b>Enter the Name:</b></td>
<td><asp:TextBox ID="txt_nm" runat="server"/></td>
</tr>
<tr>
<td><b>Enter the Password</b></td>
<td><asp:TextBox ID="txt_pass" runat="server"/></td>
</tr>
<tr>
<td></td>
<td><asp:Button ID="Button1" runat="server" onclick="Button1_Click"/></td>
</tr>
</table>
</div>
</form>
</body>
</html>
After that write the following code in code behind
protected void btnSend_Click(object sender, EventArgs e)
{
Response.Redirect("getquerystring.aspx?name="+txt_nm.Text+"&pasword="+txt_pass.Text);
}
Now Right click on your website and Add New item and add new page (getquerystring.aspx) open that getquerystring.aspx page and write the following code
On  code behind
protected void Page_Load(object sender, EventArgs e)
{

 string name = Request.QueryString["name"];
 string password = Request.QueryString["password"];
Response.Write("name=" + name + "\t" + "password=" + pasword);
}

Example


Download sample code attached


Thursday 21 March 2013

run-java-program-from-command-prompt

how to run java program from command prompt
First we check java is installed in our pc or not Open Command prompt -> type cmd ->press Enter-> type
java -version
show Example

If java in not install then follow this instruction as show below

how to run java program from command prompt Step by Step

1. Download JDK from windows.
first step is downloading correct version of JDK and correct installer for your machine. Since Java is supported for multiple platform you see lot of installer available for JDK. if you are running on windows PC than you should download Windows Installer of 32 bit machine since most of Windows desktop and laptop are 32 bit and until you know that its for Windows Server which can be 64 bit. If you are running on RedHat linux or Ubuntu than you can also download tar file.

What is difference between JDK,JRE and JVM?

 What is JIT compiler?

JDK DOWNLOAD LINK->JDK Download Link
2. Second step is to installing Java
If you are running on Windows PC than installing Java is just a cakewalk. just double click on Installer and it will install Java in your machine. it usually creates a folder under program files/Java/JDK_version , this folder is important because in many script this is refereed as JAVA_HOME and we will specify an environment variable JAVA_HOME pointing to this folder. If you are running in Linux or any Unix machine including AIX, Solaris etc. you just need to extract tar file and it will put all the binary in a folder this will be your JAVA_HOME in Linux.
3. Third Step is Setting PATH for Java.
for setting PATH you just need to append JAVA_HOME/bin in PATH environment variable. For step by step guide and details How to Set PATH for Java in Windows, Linux and Unix.

difference between Java platform and other platforms
java Path screen short
 Wirte Click on My computer and select Property


4. Testing Java PATH
Before you run your first Java program its better to test PATH for Java. Now open a command prompt in Windows just go to "Run" and type "cmd". Now type "java" or "javac" if you see large output means Java is in PATH and you are ready to execute Java program.

Example

5. Fifth step is to write your first Java program
Best program to quickly test anything is countShopKeepers , just type below program and save it into file called countShopKeepers.java

class countShopKeepers
{
    public static void main(String[] args)
    {
        int numberOfNewShopKeepers = 70;
        int numberOfNewReturningKeepers = 87;
        int numberofshoopers = 0;
        numberofshoopers = numberOfNewShopKeepers + numberOfNewReturningKeepers;

        System.out.println(numberofshoopers);

    }
}
save program   countShopKeepers.java  in c drive within mywork folder

Run Program From command frompt

open command

Wednesday 20 March 2013

what is mongodb

what is mongodb

what is mongodb

MongoDB is the leading NoSQL database, designed for how we build and run applications today. MongoDB empowers organizations to be agile and scalable. It helps them enable new types of applications, improve customer experience, accelerate time to market and reduce total cost of ownership (TCO).
MongoDB is a general purpose, open-source database. MongoDB features:
  • Document data model with dynamic schemas
  • Full, flexible index support and rich queries
  • Auto-Sharding for horizontal scalability
  • Built-in replication for high availability
  • Text search
  • Advanced security
  • Aggregation Framework and MapReduce
  • Large media storage with GridFS
  •  

 MongoDB is an open-source, high-performance, document-oriented database. Documents are JSON-like data structures stored in a format called BSON (bsonspec.org). Documents are stored in collections, each of which resides in its own database. Collections can be thought of as the equivalent of a table in an RDBMS. There are no fixed schemas in MongoDB, so documents with different “shapes” can be stored in the same collection. 

MongoDB features full index support (including secondary and compound indexes); indexes are specified per collection. There is a rich, document-based query language (see reverse) that leverages these indexes. MongoDB also provides sophisticated atomic update modifiers (see reverse) to keep code contention-free. 

Clustered setups are supported, including easy replication for high availability, as well as auto-sharding for write-scaling and large data-set sizes.

Organizations of all sizes use MongoDB to quickly and easily develop, scale and operate applications. Instead of storing data in rows and columns as one would with a relational database, MongoDB stores a binary form of JSON documents (BSON).

Dev’Backup/Restore
MongoDB ability to dumpadb/collection empowers developer
Possible to restore part of the production data set simply on a development box
Backup a MongoDB by collections in S3,recoverondev’platform in a matter of minutes
What we expect from our NoSQLDBMS and our compromise No downtime
:Hig havailability
No migrationcost Easy to deploy,redeploy,replicate,reconfigure
Quietly losing seconds of writes is preferable to weekly minutes-long maintenances periods
minutes-long unscheduled downtime and manual failover in case of hardware failure.

About MongoDB

MongoDB is a document-oriented database and each document has its own structure. Unlike a RDBMS in which each record must conform to the structure of its table, each document in MongoDB can have a different structure; you don’t have to define a schema for documents before saving them in the database.
MongoDB groups document objects into collections. You can think of a collection as a table like you would create in a RDBMS, but the difference as I said before is that they won’t force you to define a schema before you can store something.

With MongoDB, you can embed a document inside another one, which is really useful for cases where there is a one-to-one relationship. In a typical RDBMS you’d need to create two tables and link them together with a foreign key to achieve the same result. MongoDB doesn’t support joins, which some people see as a con. But if you organize your data correctly then you’ll find you don’t need joins, which is a pro since you’ll benefit from very high performance.

It’s worth mentioning the aim of MongoDB and NoSQL isn’t to kill off RDBMS. RDBMSs are still a very good solution for most of the development world’s needs, but they do have their weaknesses, most noticeably the need to define a rigid schema for your data which is one problem NoSQL tries to solve.

Example is Coming Soon Related to MongoDB

Tuesday 19 March 2013

On Page Load How I Can Send Email using Asp.net

On Page Load How I Can Send Email using Asp.net
In my previous Article I explained how to Sending email with GMail's SMTP server in ASP.NET.
This example shows how to Send Email Using Gmail In ASP.NET. If you want to send mail using Gmail account or it's SMTP server in ASP.NET application if you don't have a working smtp server to send mails than sending e-mail with Gmail is best option.

using System.Net.Mail;
After that write the following code in button click
protected void  Page_Load(object sender, EventArgs e)
{
try
{
string from=Request["from"];
string to=Request["to"];
string password=Request["password"]; 
string subject=Request["subject"];
string Body=Request["Body"]; 
MailMessage Msg = new MailMessage();
// Sender e-mail address.
Msg.From = new MailAddress(from);
// Recipient e-mail address.
Msg.To.Add(txtTo.Text);
Msg.Subject = txtSubject.Text;
Msg.Body = txtBody.Text;
// your remote SMTP server IP.
SmtpClient smtp = new SmtpClient();
smtp.Host = "smtp.gmail.com";
smtp.Port = 587;
// pass the gmail user id and password
smtp.Credentials=new System.Net.NetworkCredential(from,password);
smtp.EnableSsl = true;
smtp.Send(Msg);
Response.Write("send");
// get the message

}
catch (Exception ex)
{
// Response.Write(ex.Message);
}
}
                   
Here we used smtp.Port=587 this is the port number which is used by gmail that’s why we used this port number. In some situations if you get any error regarding security remove smtp.EnableSsl = true;
Example

  In this example normal you can write a url as shown below .only you have to change the eamil id and password .

localhost:2796/emailsending/mailsender.aspx?from=xyz@gmail.com&to=avc@gmail.com&password=11123344&subject=hello&Body=this is a col example


Download sample code attached

how to Sending email with GMail's SMTP server in ASP.NET

how to Sending email with GMail's SMTP server in ASP.NET
Small Introduction:
Sending email is a very common task in any web application. In almost every web application (web site), their will atleast be an occassion to send email in any fashion.
sending email on page load passing values in query string
The SmtpMail class in ASP .NET provides properties and methods for sending messages using the Collaboration Data Objects for Windows we will see, how can we send email from an ASP .NET page.
Description:
now I will explain how to implement mail sending concept with attachment in asp.net. To implement this concept first we need to following reference to our application System.Web.Mail namespace What is System.Web.Mail
The SmtpMail class in ASP .NET provides properties and methods for sending messages using the Collaboration Data Objects for Windows 2000 (CDOSYS) message component In this article, we will see, how can we send email from an ASP .NET page. In a nut shell, today, we will be looking into the following:

. What we need to send Email from an ASP .NET?
. How to send an email from an ASP .NET page?
. What is new in sending email? (SmtpMail.SmtpServer)
. How can we send attachments in an email?

After that design your aspx page like this
<html xmlns="http://www.w3.org/1999/xhtml">
<head id="Head1" runat="server">
<title>Send Mail using with gmail crendentials in asp.net</title>
</head>
<body>
<form id="form1" runat="server">
<div>
<table style=" border:1px solid" align="center">
<tr>
<td colspan="2" align="center">
<b>Send Mail using gmail credentials in asp.net</b>
</td>
</tr>
<tr>
<td>
Gmail Username:
</td>
<td>
<asp:TextBox ID="txtUsername" runat="server"></asp:TextBox>
</td>
</tr>
<tr>
<td>
Gmail Password:
</td>
<td>
<asp:TextBox ID="txtpwd" runat="server" TextMode="Password"></asp:TextBox>
</td>
</tr>
<tr>
<td>
Subject:
</td>
<td>
<asp:TextBox ID="txtSubject" runat="server"></asp:TextBox>
</td>
</tr>
<tr>
<td>
To:
</td>
<td>
<asp:TextBox ID="txtTo" runat="server"></asp:TextBox>
</td>
</tr>
<tr>
<td valign="top">
Body:
</td>
<td>
<asp:TextBox ID="txtBody" runat="server" TextMode="MultiLine" Columns="30" Rows="10" ></asp:TextBox>
</td>
</tr>
<tr>
<td>
</td>
<td>
<asp:Button ID="btnSubmit" Text="Send" runat="server" onclick="btnSubmit_Click" />
</td>
</tr>
</table>
</div>
</form>
</body>
</html>
After that add this namcespace in your codebehind
using System.Net.Mail;
After that write the following code in button click
protected void btnSubmit_Click(object sender, EventArgs e)
{
try
{
MailMessage Msg = new MailMessage();
// Sender e-mail address.
Msg.From = new MailAddress(txtUsername.Text);
// Recipient e-mail address.
Msg.To.Add(txtTo.Text);
Msg.Subject = txtSubject.Text;
Msg.Body = txtBody.Text;
// your remote SMTP server IP.
SmtpClient smtp = new SmtpClient();
smtp.Host = "smtp.gmail.com";
smtp.Port = 587;
smtp.Credentials=new System.Net.NetworkCredential(txtUsername.Text,txtpwd.Text);
smtp.EnableSsl = true;
smtp.Send(Msg);
Msg = null;
Page.RegisterStartupScript("UserMsg", "<script>alert('Mail sent thank you...');if(alert){ window.location='SendMail.aspx';}</script>");
}
catch (Exception ex)
{
Response.Write(ex.Message);
}
}
                   
Here we used smtp.Port=587 this is the port number which is used by gmail that’s why we used this port number. In some situations if you get any error regarding security remove smtp.EnableSsl = true;
Example


Download sample code attached


..


New Updates

Related Posts Plugin for WordPress, Blogger...

Related Result